React Terminal
We do this not because it is easy, but because we thought it would be easy - Some guy on Reddit
I was inspired by this post about how to create an interactive terminal based portfolio. But they used jQuery Terminal Library, after tearing out all of the jQuery from my site the last thing I wanted to do was to put more of it in. First I had a look at Terminal-in-React, looked ok to me, but NPM complained about the number of vulnerabilities in it. So I thought to myself, how hard could it be? Spoiler, quite hard.
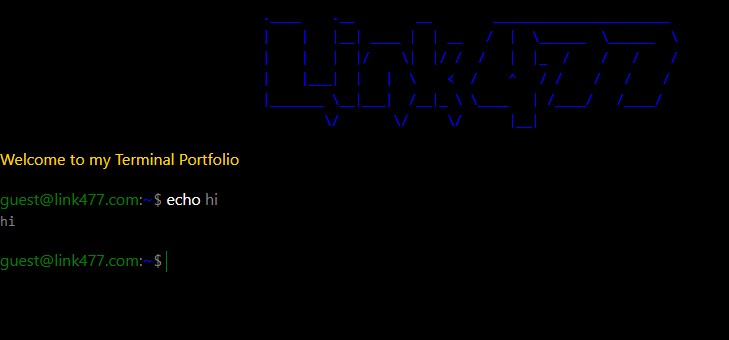
I decided that the only library that I would use was React. Looking at the article above I used figlet playground to create the ASCII art.
After that it was figuring out how to do the text entry. I had a brief look at how the jQuery Terminal Library does it (I did not look at the code as that would be cheating! But just watched it though Chrome Dev Tools, it looks like it uses a Text Area and as you type it puts each character into a span). “Why bother doing that?” I thought to myself, I’ll just use a single element such as the humble Input element (another spoiler, that’s why jQuery Terminal Library can do syntax highlighting on the fly and my one cannot). Now which element type should I use to get the input? Inputs do not seem to have the ability to stretch vertically (they do, but the text they contain does not) and I decided that the Text Area was not quite what I wanted. CSS Tricks had the idea of using a Content Editable Span, I had recently played with that at work and giving it a Tab Index of 0 and auto focusing on it seemed to do the trick (my apologies for using a screen reader on that, I am pretty sure that it is terrible especially as it does not leave the element on tab (the element vanishes on the Joke command so it is not totally terrible)).
Pressing the Enter key sends what you have input to one function which looks at the list of commands (“cd”, “clear”, “credits”, “echo”, “help”, “joke” and “ls”) and the first word entered. It also prevents the default of adding in break elements (which React really hated!). After that it then tries to follow the rules for that command, which is a cross between the logic of the Linux Terminal and what I observed in the jQuery Terminal Library.
I decided to cut my teeth on the Clear function. After all all it does is clear the array TerminalOutput and I had not even coded a way to display it or to add anything to it! Something which I discovered very quickly with a content editable span in React is that it can enter its content into a React State hook, but this:
const [terminalText, setTerminalText] = useState<string | null>('');
<span
  role="textbox"
  aria-label="Console text input"
  id="terminal"
  className={styles.terminal}
  contentEditable
  onInput={(e) => setTerminalText(e.currentTarget.textContent)}
  onKeyDown={(e) => {
    if (e.key == 'Enter') {
      runCommands();
      e.preventDefault();
    }
  }}
  tabIndex={0}
  autoFocus={true}
  ref={(e) => setTerminalSpanRef(e)}
>
  {terminalText}
</span>;
Was not something that really worked, as every time you typed a character the cursor was set to the beginning of the span (and React told me off in the console). So instead I used a ref to the element and then simply set the Text Content to an empty string.
When I looked at my next command “Help”, this was where I also figured out the whole displaying the output idea. This command inserts into the terminalOutput array the Command, Output, the directory the user is in at the moment and any colour to apply to the output (this does use some magic numbers). Then it was simply a case of Mapping through it and putting in the nested spans for the username and directory (the TerminalPath component), then the Pre tag with the output (as Pre respects whitespace). I’ve removed the syntax highlighting from this to make it a bit more readable:
{
  terminalOutput.map((priorCmd, j) => {
    return (
      <div key={j}>
        <TerminalPath
          path={priorCmd[TerminalHistoryKeys.Directory]}
        ></TerminalPath>
        <span className={styles.greyText}>
          {priorCmd[TerminalHistoryKeys.Command]}
        </span>
        <pre
          className={`${priorCmd.length >= 4 ? priorCmd[TerminalHistoryKeys.Colour] : ''} ${styles.outputText}`}
        >
          {priorCmd[TerminalHistoryKeys.Output]}
        </pre>
      </div>
    );
  });
}
The help output was more inspired by looking at the setup in Terminal-in-React rather than the list you get in the jQuery version.
LS and CD were where I went next. At the moment the structure is inspired by the example from the article. It currently only supports top level folders with text in the inner folders, but in theory it could be extended to support more levels (I just have not thought of anything better to put in there!). Using ~ or ~/ as the second arguments you can see the top level directory (.. will work in the next levels). This was fun getting to work with tab completion! It uses RegEx to find the closest, if any, match to the directories. For LS it will print out the relevant structure and CD will update the path variable, if it is given a wrong section argument it will print out an error message.
The Terminal Path is simply passed as the path prop:
export default function TerminalPath(props: TerminalPathProps) {
return (
<span className={styles.terminalLabel}>
guest@link477.com<span className={styles.greyText}>:</span>
<span className={styles.blueText}>{props.path}</span>
<span className={styles.greyText}>$</span>
</span>
);
}
Echo and Credits were just setting the text content in the output.
The big one was Joke. Like the article I used the Joke API, a simple fetch call and, as I’m using TypeScript, setting up an interface.
export interface JokeInterface {
  error: boolean;
  category: string;
  type: 'twopart' | 'single';
  joke: string;
  id: number;
  safe: boolean;
  lang: string;
  flags: { [index: string]: boolean };
  setup: string;
  delivery: string;
}
Then I had the bright idea of imitating the typing effect like the article did. The article just needed to set the delay and typing options, as they were using the jQuery Terminal Library. As I was not using this I took advantage of useEffect where I could set getJoke to true. This variable switched the editable span to a read-only one and appends a new Pre tag. After Fetch gets the joke it uses setInterval to put one character at once into the Pre tag’s text (using React state and most importantly clearing the state at the end). Once it has finished typing it hands control back to the user and inserts to the terminal history.
To give some more polish I put in commands for Tab, Up and Down. Tab runs autocompletion where it uses RegEx to search for the nearest command (if it exists). Up and Down scroll through the Terminal History array. Both of these update the Text Content of the Editable Span, which has the effect of moving the cursor to the beginning of the text. Using the following code I was able to set it back to the end:
const range = document.createRange();
range.setStart(terminalSpan, 1);
range.collapse(true);

const sel = window.getSelection();
sel?.removeAllRanges();
sel?.addRange(range);
At some point I may add some more features to the terminal and revisit the code to make it a bit less spaghetti like.